
| You must desolder the original 32K ram chip. I used a needle
to bent up the pins while I was heating with the soldering iron.
As you can see, the RAM chip is the left one (the LCD display
being up and the battery case down). There is 28 pins to desolder.
We don't need this chip any more, so you can throw it if you want. Once this is done, check the absence of soldering bridges. Put some fresh solder on all the pins (there must be 32 pins, the first 28 used by the old ram, and the last 4 wich were free), it will be easier to solder the new ram. |
 |
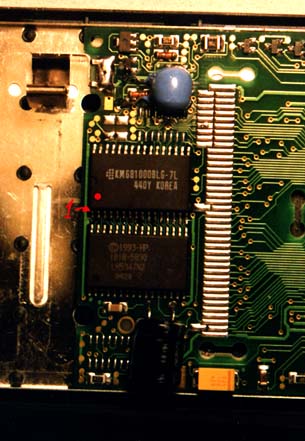 |
Solder the new ram, 128K x 8bits static SMD. Take care at the
orientation of the ram: The first pin is down near the ROM chip, near the battery case. There's a dot on the
chip near one corner of the ram locating the pin number 1. It allready works!! Close the HP (see how to do it) replace the batteries and check if the HP turns ON... If it doesn't, then you are in troubles... Reopen your HP, check all your solders, check for soldering bridges, try to bend up the pins to check if they are good soldered,... If you have done it carrefully, there should be no problems. At this point, you have 128K. You may want to stop now, there's no problem. If on the other hand you are brave enough, you can try to do the second part of the upgrade: adding 128k more for a total of 256k! |